http://www.wigextensionsale.com/products/outre-sim...
http://www.wigextensionsale.com/products/outre-100...
http://www.wigextensionsale.com/products/sensation...
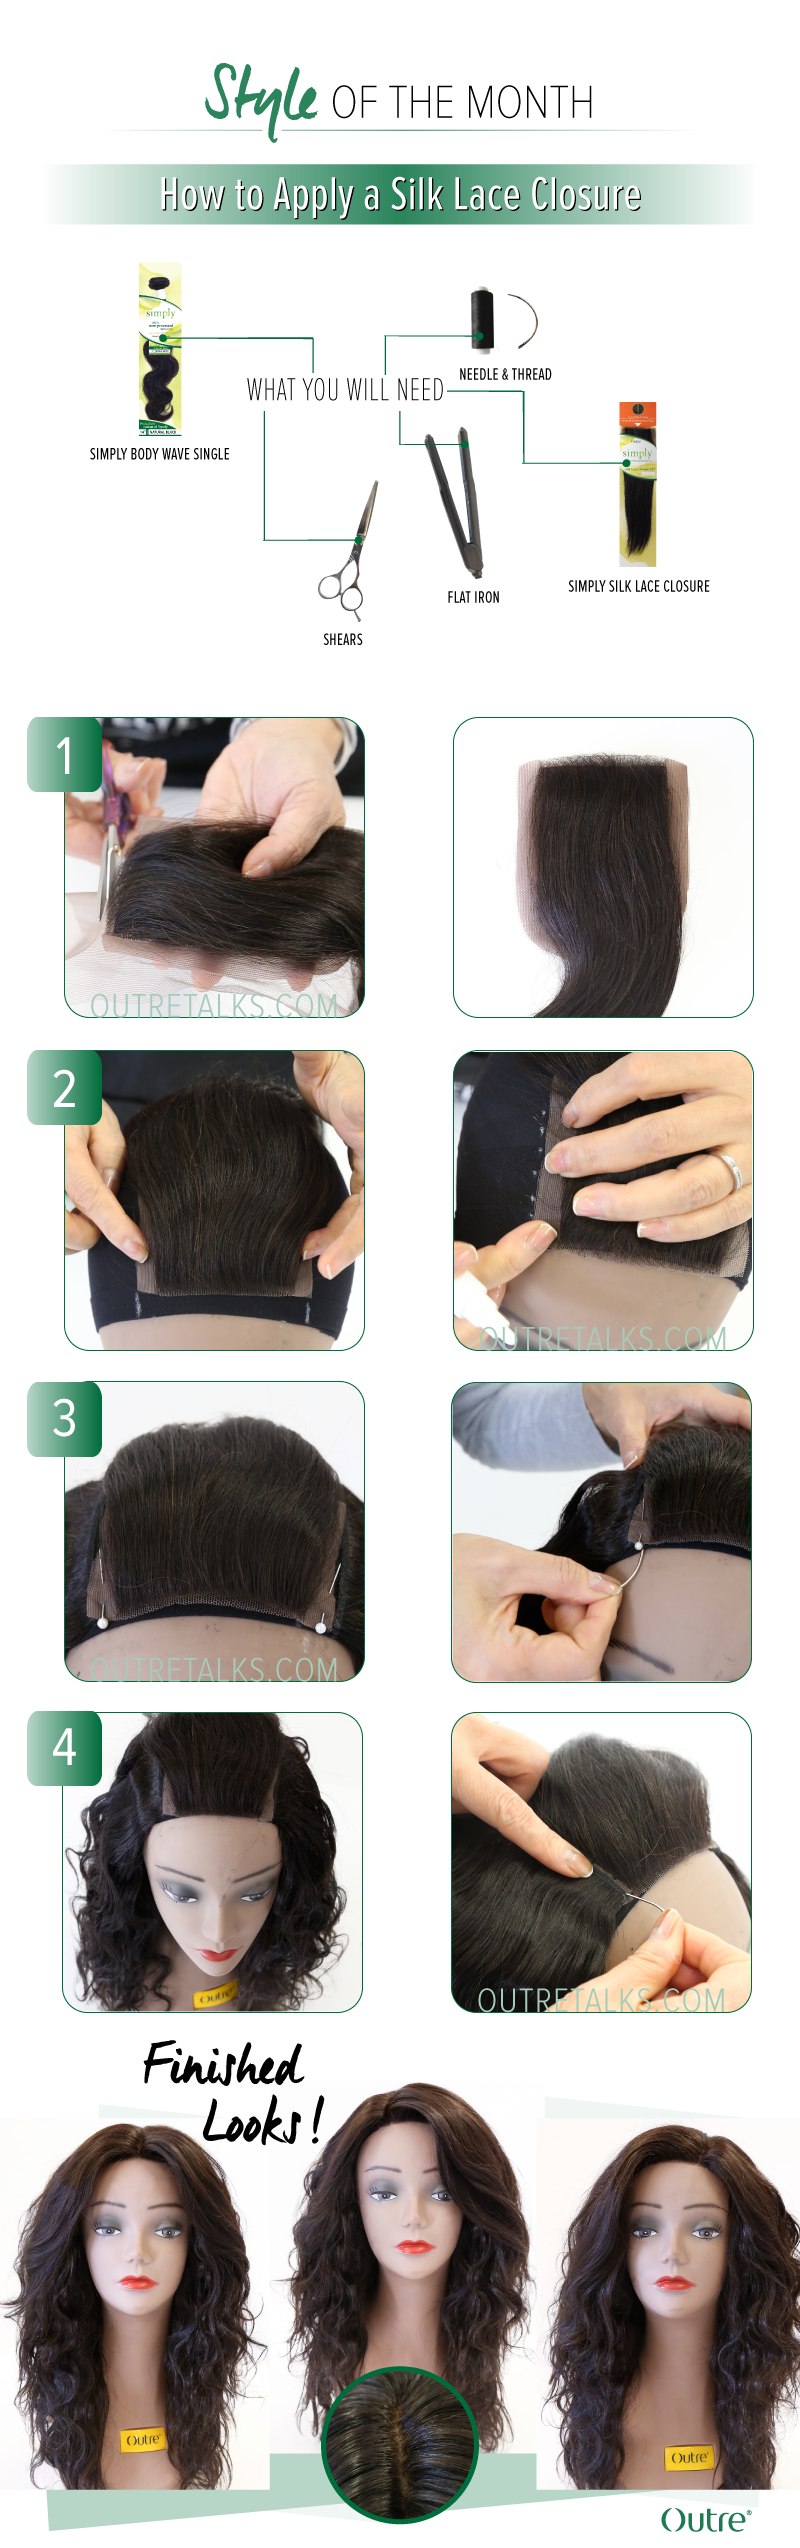
Designed to complete your style flawlessly, our silk lace closures will seamlessly blend with the hair of your weave, while giving you the option to part your hair as you please. Learn step-by-step how to apply a silk lace closure to your install for that perfect finish.
Note: When weaving, you can sew the silk lace closure down before sewing in the rest of your weave. In our tutorial, we created a u-part wig first, and then applied the closure to the wig.
What you will need:
- Simply Silk Lace Closure
- Simply Natural Body Wave
- Shears
- Flat Iron
- Thread & NeedleStep 1
Cut the excess lace around the base of the silk lace closure, leaving about half an inch of lace around the two sides and the back of the closure.
Step 2
Make a mark at both ends of the closure at the front. Then, bring the closure forward so that it aligns with your natural hairline, and trace the edge of the closure all around. This is so that you can see where the closure will be placed.
Step 3
Pin down the lace closure on the stocking cap wig so that the closure lays nice and flat. Then, begin sewing the closure down.
Step 4
After the closure is securely installed, we recommend sewing one more track on top of the half-inch lace that was left out, to cover the lace and give more volume at the top.
Step 5
Decide where you want to part the hair. Then, using a flatiron, slightly press the hair at your desired parting to direct the hair accordingly.
Voila! With your silk lace closure securely in place, you can move and groove without having to worry about your tracks showing, or how realistic your weave is looking.